
I realize this tutorial is coming a day late, but I also know there will be other days you just want to take pictures of the moon. We have a about 4-6 super moon’s a year and then there are just times that the moon looks awesome and you want a picture. I see a lot of moon images pop up on Facebook, but very few actually show the detail of the moon. That’s OK too. But for those of you who’d like to be a little more technical, I’m hoping this tutorial will work. You can either use a smart phone or DSLR camera. I’m making the DSLR instructions as simple as I know how, but you may want to have your manual on hand.
First the easy instructions-SMARTPHONES. Open your camera app and frame the moon. Now, tap on the moon. Most smartphones will let you touch where you want to have your camera meter. In this case, you want to meter (take a light reading) of the moon. Now take your picture. In most cases, the rest of the picture will be dark and you will have captured the moon’s detail. I can’t guarantee that this is a fool proof method or will work 100% of the time with smartphones, but it should help. It’d be really awesome if you left a comment on this post telling what kind of smartphone you have and if this worked for you.
DSLR instructions are a little more complicated and you may want your manual handy. So first things first, you will most likely want your camera to be in TV mode (stands for time value and controls your shutter speed-or how fast your camera takes a picture). You’ll need to dial in your shutter speed, so start turning until you see a number like 500-800 pop up in the little LCD screen that’s on top of your camera (you can also see the numbers change when you look through the viewfinder but you may have to press the button to make your camera focus for the numbers to be visible). Canon cameras literally have a dial on the top near the shutter button. This number will not show up on the LCD where pictures are displayed. Put your camera in spot meter mode (not sure what it’s called on Nikon, but you want the mode that reads from the center of the viewfinder and NOT the entire scene).
Point your camera at the moon, making sure it is in the center of your picture. Press your shutter to set focus. When you do this, you camera should meter for the center of the moon and be set to expose correctly. Now take the picture. *It is possible you may have to change the ISO of your camera to a slightly higher number IF your camera won’t take at the speeds I’ve listed above. You’ll know it won’t when you see numbers blinking as you look through the view finder and focus.
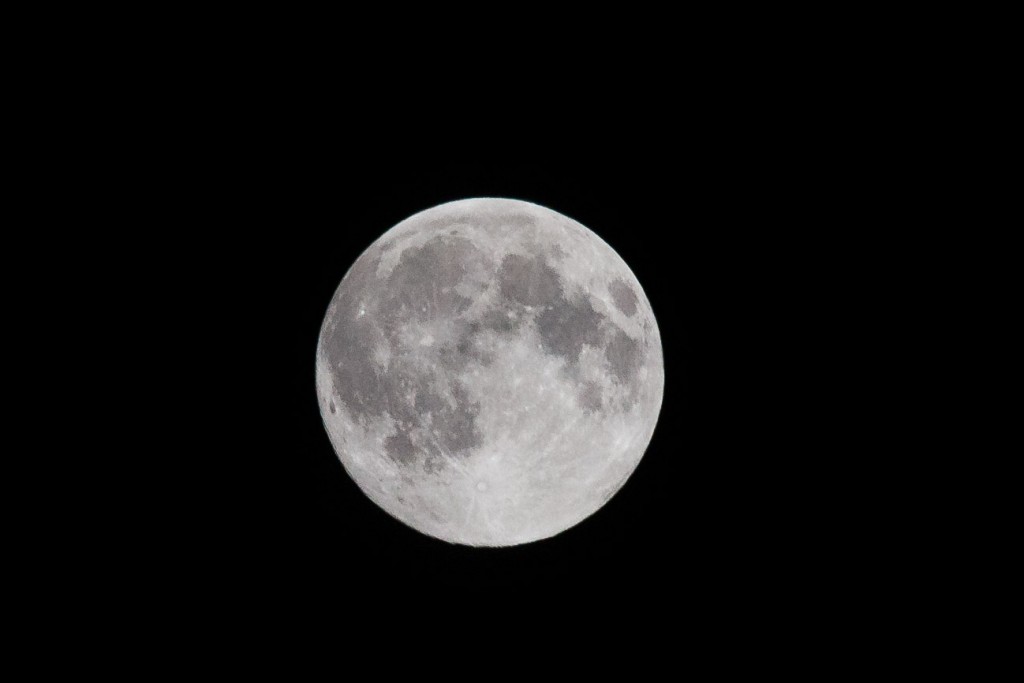
These instructions are not foolproof and I wish I could make them simpler and guaranteed to work 100% of the time. But I do hope you have some fun trying to capture the moon. For those of you interested in what my camera settings were, I used manual mode with the following:
Shutter Speed: 1/800th of a second
Aperture: 10
ISO: 1000
Focal Length: 300mm